How To: Upload Your Webinar/Zoom recording
Need help to upload your Webinar/Zoom recording? Follow these simple steps below:
Step 1: Complete and Record Your Webinar
When starting the Webinar from within Zoom/Google Meet/Microsoft Teams, select the option to Record to the Cloud or to the device.
A red light will appear to indicate that the recording has started.
Step 2: Convert Webinar to Video
Once the start date and time of your Webinar in Vidzing has passed you can upload the recording.
This means that those who have access to the Webinar can watch it back via the same link.
In the Webinar set up, scroll down to 'Add Recording', and click the purple 'Add Recording' button.
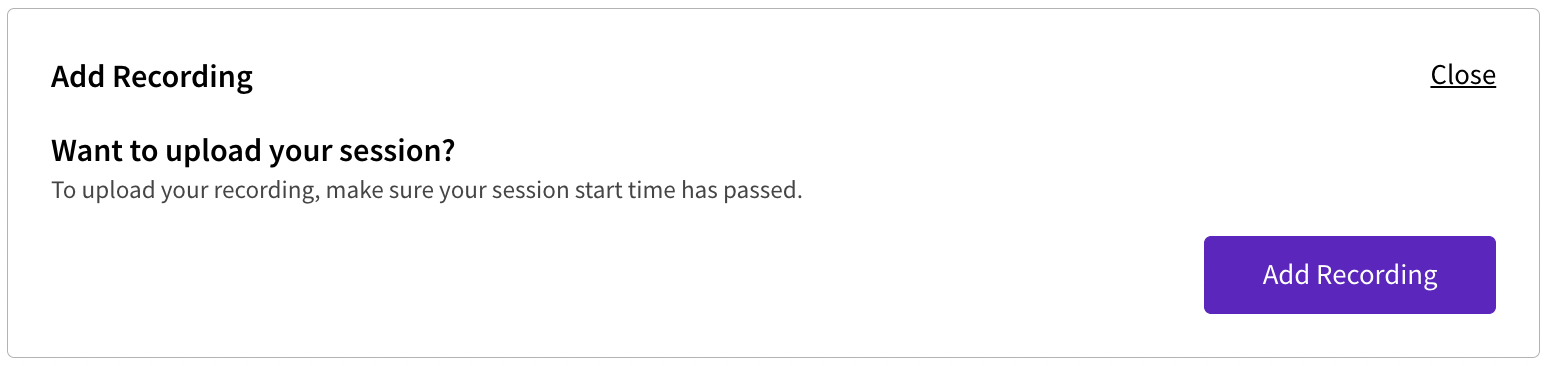
Note: If the 'Add Recording' button is still grey, it means the session start time has not passed.
Uploading the recording will change this content from a Webinar to a Video, so make sure you are certain before continuing.
Step 3: Update Information (optional) and Upload the Recording
If needed, update the title, description, price or any other components of the content.
You may want to add a price if you want to offer the recording to customers who didn't purchase the webinar.
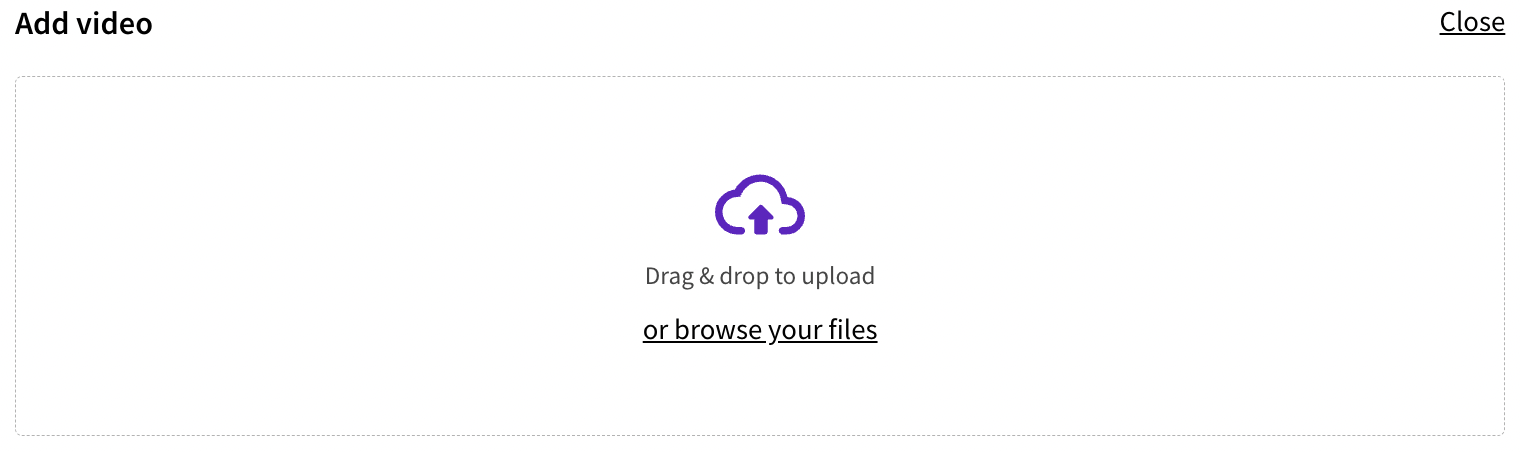
Scroll down the the 'Add Video' section, and drag & drop or browse your files to select the correct recording.
Once your recording is uploaded, scroll down and click 'Save'.
Need more help?
If you encounter any issues or need further assistance, please start a live chat and we will get back to you as soon as possible!