How To: Sell a Package of Products
Need help setting up and selling a package of products? Follow these simple steps below:
Step 1: Create your Bundle
Access the Creator Portal Dashboard and click the purple 'Create Content' button.
Select the 'Bundle' option from the available content types.
Step 2: Set Up Bundle Details
Give your Bundle a name, description (optional) and update the artwork (optional).
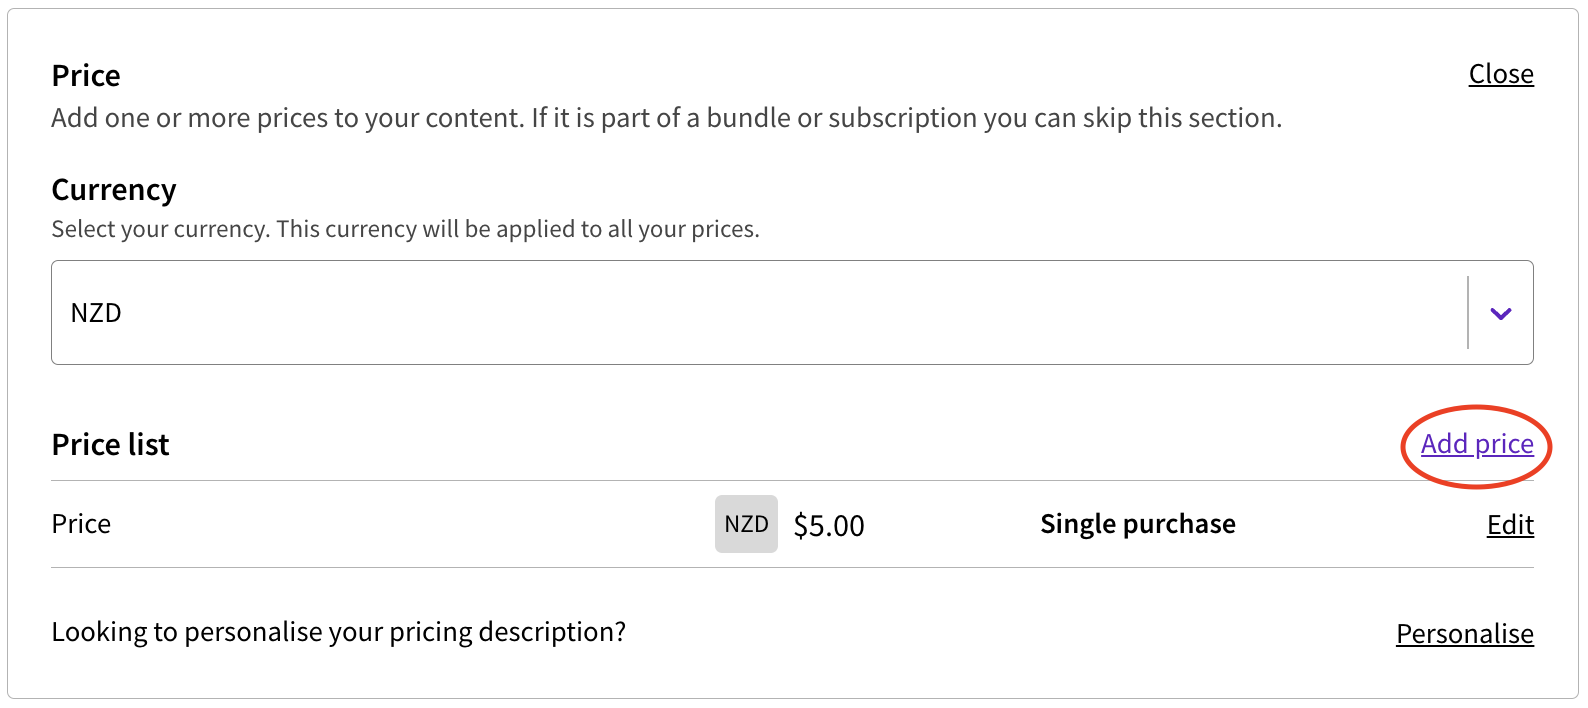
Step 3: Set Pricing
Set a currency in the 'Price' section.
Click 'Add price' to set a new price. Give your price a label, an amount, and a rental duration (if applicable).
Step 4: Set Release Timing
Adjust your timezone (if needed).
Setting a start date and time will determine when a video is able to be watched from.
If the start date and time is in the future you can pre-sell the content, but customers will only be able to watch the video from the set start date and time.
NOTE: If the content is ready to be watched, set the start date and time to now.
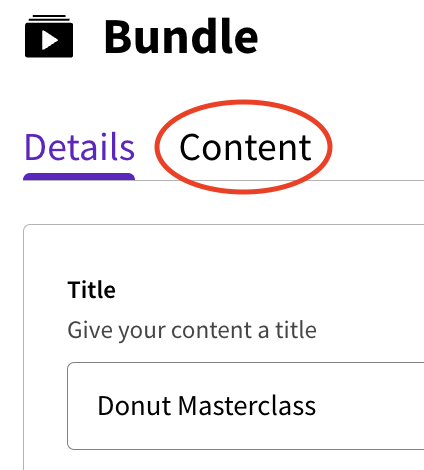
Step 5: Content Set Up
Scroll back to the top of the page, and find the 'Content' tab, found next to the 'Details' tag, shown below.
Get started by creating and naming your first Group, or by importing one from another Bundle.
Groups
Groups allow you to categorize your content into smaller, more specific sections. Within your Group, you can also create new content or import it from your library.
To reorder Groups and Content, click and drag using the dots on the left, to edit or remove click the dots on the right.
Here’s a few examples to get you started:
Bundle: Competition Livestreams
Groups: New Zealand, Australia, United States…
Bundle: Wellness Library
Groups: Yoga, Meditation, Mindfulness …
Step 6: Adding or Importing Groups
'Group 1' is created by default as each bundle must have at least one group.
To edit 'Group 1', click 'Add content' next to the drop down arrow.
From here you can change the Group title to better suit your content. Once updated, click save.
To add another group, click 'Add group'.
You can also import groups from other bundles using the 'Import Group' button.
Step 7: Adding or Importing Content
Within a group, you can either create new content or use previously created content.
Clicking 'Add content', will open a pop up which will take you through creating a new piece of content. Scroll down to 'Related Articles' for a detailed breakdown on creating each content type.
Clicking 'Import content' will open a pop up with your content library. Add as much content as required.
Once you have added all groups and content, head back to the 'Details' tab at the top.
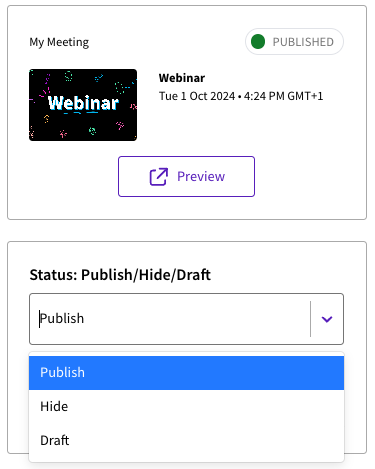
Step 7: Publish or Preview
Change the Status of the content based on if the content is ready to be shared or not.
To preview your content, set the Status to 'Hide'. Save the Bundle, then click on 'Preview' at the top right hand side.
To Publish your content, if it's ready to share, set the Status to 'Publish', then scroll down and click 'Save'.
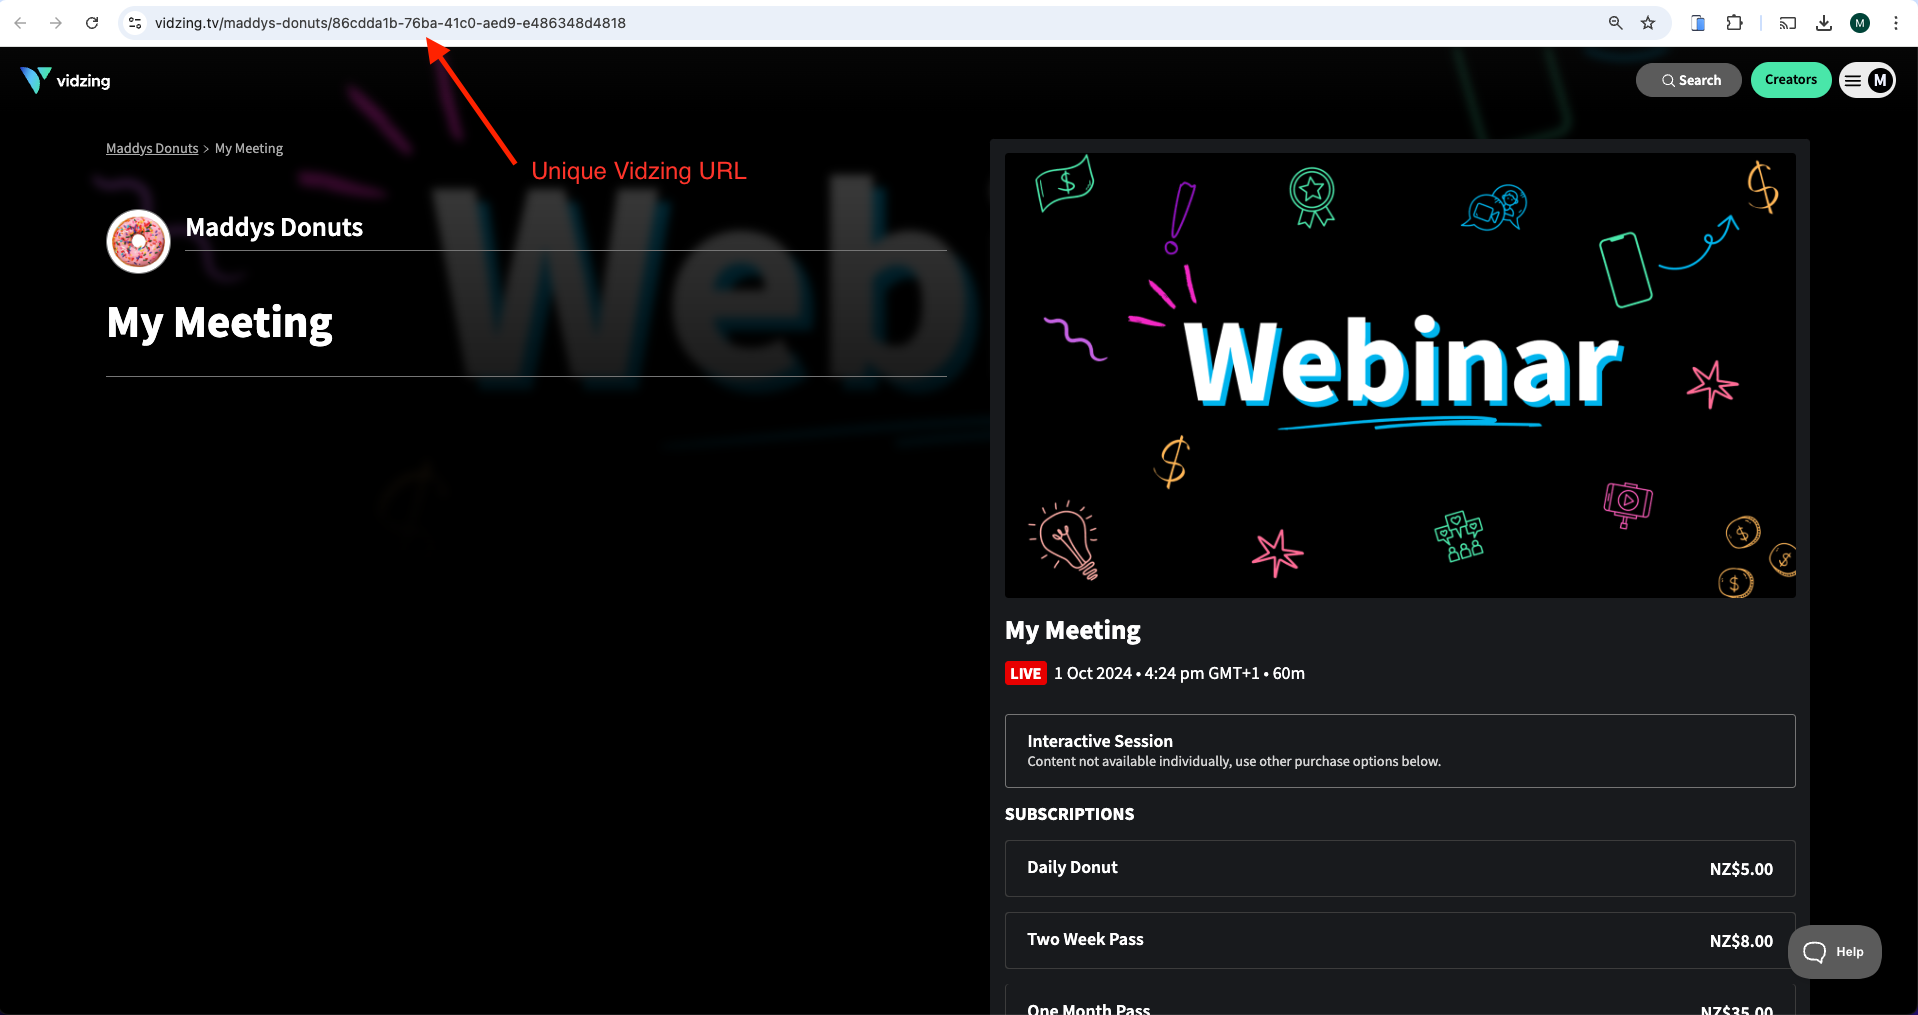
Step 8: Share Your Bundle
At the top right side of your Bundle set up, click Preview. This will take you to the published Bundle.
Copy the unique Vidzing URL from the published Bundle and share this with your audience.
Need more help?
If you encounter any issues or need further assistance, please start a live chat and we will get back to you as soon as possible!